Routine maintenance is performed on a regular basis for signs of damage and general wear and tear. However, before renting a Tulsa Townie bicycle, it is the rider’s responsibility to perform an overall safety check before riding a specific bike. Make sure to look over the bicycles and check for overall appearance before riding.
Bicycle Riding Safety
Riding a bicycle and driving an automobile are very similar. Individuals must be cautious of pedestrians, other vehicles and other bike riders to insure safety. Please review the general safety tips below to insure you are following the necessary safety precautions when operating a bicycle.
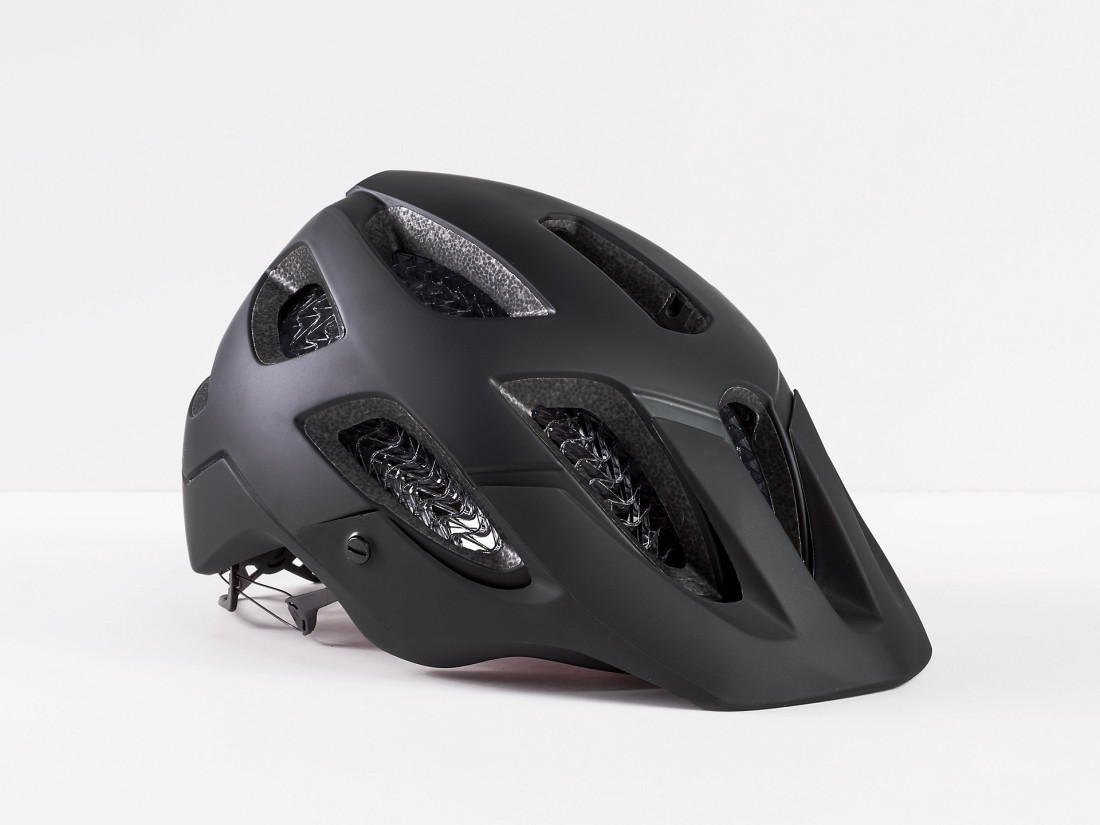
Always wear a helmet. Research shows that by wearing a helmet you can decrease the risk of head injury if involved in an accident by up to 60 percent.
Make yourself visible. Visibility is a key element in safety when riding a bicycle, especially when riding at night. Be sure to wear brightly colored clothing during the day and light colored clothing at night. Tulsa Townies bicycles are equipped with reflectors to enhance visibility at dusk. Tulsa Townies bicycles are not equipped with headlights for night riding and should not be ridden after dark.
Dress for the weather. Remember to dress appropriately in case of inclement weather or temperature variations. Try wearing several layers of clothing so you may adapt accordingly.
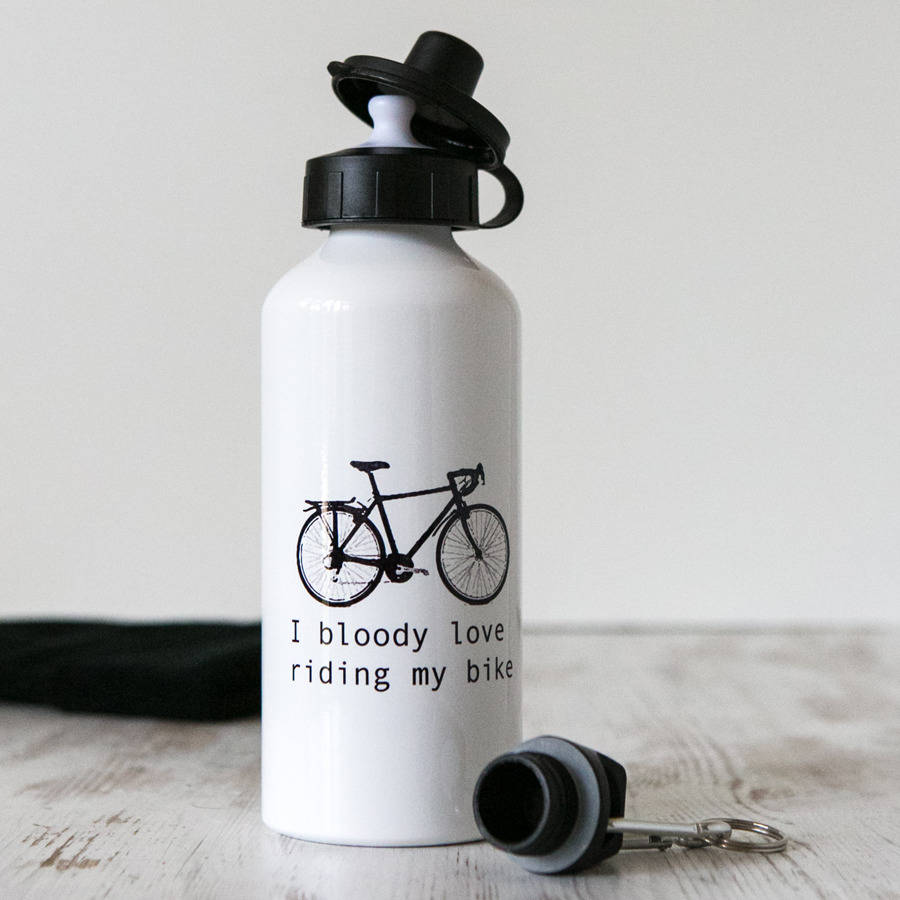
Drink lots of water. Don’t forget to hydrate yourself on a regular basis. Riders may choose to carry water bottles with them or frequent the park’s water fountains.
Obey Traffic Signs and Signals. Riders are encouraged to ride on designated bicycle sidewalks or trails. If it is necessary to ride on the road, remember to ride on the correct side of the road – traveling with traffic just as you would in a car.
Use Hand Signals. Hand signals tell motorists and pedestrians what you intend to do. Using signals is not only a courtesy, it is as a matter of obeying the law and ensuring self-protection.
Be Ready to Brake at Any Time. It is important to remember to be aware of your surroundings at all times. Pay attention to pedestrians and other bike riders to avoid collision or accidents and make sure you know how to use the brake-locking feature on the bicycle. Allow extra distance for stopping in the rain, since breaks are less efficient when wet.
A cycling helmet is the most important piece of equipment that every cyclist should own. The majority of cycling fatalities occur due to head injuries. A helmet helps to protect ones head if the cyclist should happen to crash. There are many different styles of helmets to choose from including mountain bike helmets, road bike helmets and BMX helmets.
Instructions
Decide which style of helmet to purchase. Most cycling manufacturers classify their helmets as road, mountain, BMX/downhill, BMX/skate, youth/kids or racing style.
Determine your budget. Helmets can cost anywhere between $25 and $200.
Purchase a certified helmet. Look for a CPSC (Consumer Product Safety Commission) or ASTM (American National Standards Institute) or Snell Memorial Foundation sticker inside the helmet.
Properly fit the helmet. The helmet should sit level on ones head and should not be tipped forward or backward. The helmet should fit snuggly, but not be uncomfortably tight. If the helmet slides all over the place, choose a smaller helmet.
A good quality helmet will have an adjustable chin strap and pads which can be attached to the inside of the helmet to fine tune the fit. Better quality helmets have an adjustable ring at the back of the helmet, which can be made tighter or looser as needed.
Tips & Warnings
BMX helmets are meant for stunt riding. They are heavier, and have fewer vent holes than other types of helmets. Many BMX riders decide to go with a full face helmet, which looks similar to, but is lighter, than a motorcycle helmet.
Mountain bike helmets are lighter and have more vent holes than a BMX helmet. Most mountain bike helmets have a removable visor attached to the front.
Road bike helmets are the lightest and most ventilated of all the bike helmets.
Specialty helmets, such as the teardrop shaped helmets worn by time trials racers, are also available.
Helmets should be discarded and replaced with a new one anytime they are involved in a crash. Hairline cracks may be present, which are not visible to the naked eye. These hairline cracks could compromise the integrity and effectiveness of the helmet.
Although a good variety of helmets can be found online, a helmet really needs to be tried on in order to ensure that it fits correctly.
When Raven Johnson was one year old, she started volunteering at the Community Cycling Center. At the time, Raven didn’t have much say in the matter, but now that she’s six, she really enjoys being a part of the Community Cycling Center. Her favorite activity is to help distribute bikes at the Holiday Bike Drive because she knows she’s helping other kids get bicycles. Her mom Deborah says she really connects with the children at the Holiday Bike Drive. In fact, Raven is so generous about wanting other children to have bikes that she has donated all of her outgrown bikes to the CCC.
Deborah Johnson, a demographics teacher with Smart Girl Technologies, used to live around the corner from the old CCC location at Northeast 24th and Alberta. With Raven in a bike seat behind her, Deborah was a volunteer assistant on group rides through our Summer Rides program. Deborah has seen a lot of changes and growth take place at the CCC over the years, and she is enthusiastic to remain a part of the Center.
“I like that the CCC is community-oriented and reaching out to kids,” she explains, “And getting kids to wear helmets! I always stop kids on the street if they’re not wearing a helmet.”
To be able to volunteer with her daughter, Deborah says, is huge. As a single mom, it’s essential to be able to bring Raven along on volunteer projects. The CCC has made such a difference, Deborah explains, in always making it a welcoming environment for Raven to join her. Even more than that, Deborah stresses, is her desire to raise Raven in a lifestyle that naturally incorporates volunteering. Volunteering has always been a part of Deborah’s life and she hopes to raise Raven with the same dedication.
Deborah and Raven have tried a little of everything at the CCC, from bike cleaning and special event support to their current job of processing our bills once a month. As Raven gets older, Deborah looks forward to helping her learn more about bike mechanics as they volunteer.
Volunteering with CCC is just one of Deborah’s many projects. She was also recently accepted to be a volunteer grant evaluator with the Oregon Community Foundation. Together, Raven and Deborah love to ride bikes, visit the gorge, go swimming and attend the many local events that happen throughout the year.
We are so grateful to Deborah and Raven for their dedication over the years, and we have loved watching little Raven grow with us.
Drew wants to know which is the best material for frame building, Carbon, Alloy, Titanium or Steel. We look at the pros and cons of all the different materials and what our choice would be, although if you are a regular reader you probably already know what that is!
Question: I’m having some confusion over what frame material is preferable for a good quality road-bike. The ideal price for the frame would be in the $1500-2000 range but I’ve seen newer steel, carbon and titanium frames at this price; aside from test-riding, are there any suggestions that come to mind for specific frames/manufacturers? Also, do you know anything about the newer steel tubing (S3, Reynold 900-series) and whether those are a good option?
Thank you.
Hi Drew, This question keeps coming up and will reoccur until the end of time, I’m sure. OK we will run through the materials.
Alloy is great, cheap and responsive, but to make it better it should be mated with a set of carbon forks and if money allowing, carbon chain stays or/and seat stays. If you look back even as little as five years ago you will see nearly all race frames where built like this.
Titanium if built properly it will last for ever, it’s said if a titanium frame doesn’t break in the first month then it never will. It’s light and stiff, but expensive, again if matched to carbon front and rear ends makes for a very nice ride without much harshness. Many people say titanium/carbon mix is the top choice for the road, but I’ve also spoken to riders who have found titanium feeling dead, not giving a lively ride, so maybe it’s not so good, especially at the price.
As you will have realized if you have read some, or hopefully all, of our articles, is that we prefer carbon frames. Carbon is comfortable, handles well in most conditions and looks good. You can pick up carbon frames at a reasonable price, but you get what you pay for, there are different processes and qualities to consider. At the moment carbon is most riders’ choice and we go along with that.
Broken Carbon Frame
Steel was the only choice of frame materials not that long ago, it was heavy but, usually reliable, stiff for many years and could be any color you wanted, now though you don’t see much of it around. The new steels you mention are very light, this lightness is achieved by making the walls of the tubes thinner where it is not needed and also with the mix of metals used to make the tubes. This all makes it more difficult to braze the tubes together, temperatures have to be watched very carefully or the steel can become brittle and weak. Only an expert can use these materials, so this can be expensive.
This is our opinion, based on our experience and experience of the many riders we have spoken to about their bikes. The trouble is that if you ask ten cyclists about frames/bikes you will get ten different thoughts.
You ask what we would recommend, when it comes to carbon our choices are Time, Specialized or Giant, there are so many to pick from its very hard. We also like to look of Trek’s new Madone and the Ridley range, Look and BMC are also innovators in the art of carbon frame manufacture. There also many small producers of artisan carbon frames, these are very pricey and you should think very carefully before spending that kind of money. Be careful of small producers of carbon frames who couldn’t possibly afford to set up a frame production, they are probably importing from Taiwan or China. Many good frames come from the far east, but the bigger importers will have a very strict quality control, will have had their own designers draw the plans, would make sure that no corners would be cut and would not pass on to the customer any badly made or any frames with defects.
Well that’s our thoughts and choices on frame materials and manufacturers, stick to a known brands with a guarantee back up. With a famous brand you may be paying for the name, but you are also paying for their experience and manufacturing know how. The top brands can’t afford any breakages as word soon spreads through the trade and among the rider customer. Talk to your co-riders and team mates, as much in put as you can get should help you in your decision, or worse confuse you even more. We have said before on Bike Cycling Reviews that choosing a new frame or bike is one of the nicest and the worst position to be in both at the same time. In the end you need to like what you are looking at, design and color can sometimes be the deciding factor as we may never know the exact production methods in manufacture. Good luck and let us know what you decide or if you need more help.
Before you can select the right bike for your needs, you should ask yourself the following questions.
Where Will You Be Riding?
You’ll need to consider the type of riding you’ll be doing and the
types of surfaces you’ll be traversing. Some bikes are made specifically
for speedy travel on paved roads, some are built for rugged terrain,
and others are versatile enough to handle multiple surfaces. It’s
important to know how you’ll be using your bike in order to determine
which bicycle type is right for you.
When most of your biking involves shorter trips on paved roads—such
as when you’re commuting to work, running errands, or exercising—road bikes and hybrids offer excellent options. If you’re riding for light recreation or leisure, you could also consider an old-style cruiser or a decked-out comfort bike. However, the great thing about road riding is that any kind of bike can be used on paved surfaces under reasonable conditions.
If you plan to go off-road riding, you’ll need a bike that can absorb the shock of the rougher landscape. While hybrids can handle bumpier terrain, serious off-road riding over towpaths, farmland, and rocky trails requires a good mountain bike with wider tires and front- or dual-suspension.
For longer, cross-country journeys, touring bikes provide the best option. By attaching some side panniers, you’ll have space to carry any gear you need.
How Often Will You Ride?
You should also consider how often you plan on riding your bike. Will
you be biking every day, once a week, or just occasionally with friends
and family? If you plan on riding your bike frequently, you’ll be
better served by purchasing a higher level bike. More expensive bikes
don’t just cost more, they are more refined, more durable, and are
generally lighter in weight. However, if you’ll only be riding
occasionally, a more basic bike may be good enough. Just like any
activity that you participate in frequently—whether professionally or
recreationally—the more you ride, the more you’ll realize the value in
subtle differences in the fit and function of more expensive equipment.
Do You Have Any Health Concerns?
Your level of fitness can also be an important consideration. Your
body shape, size, and overall health can influence the type of biking
you do, as well as the type of bike you’ll need.
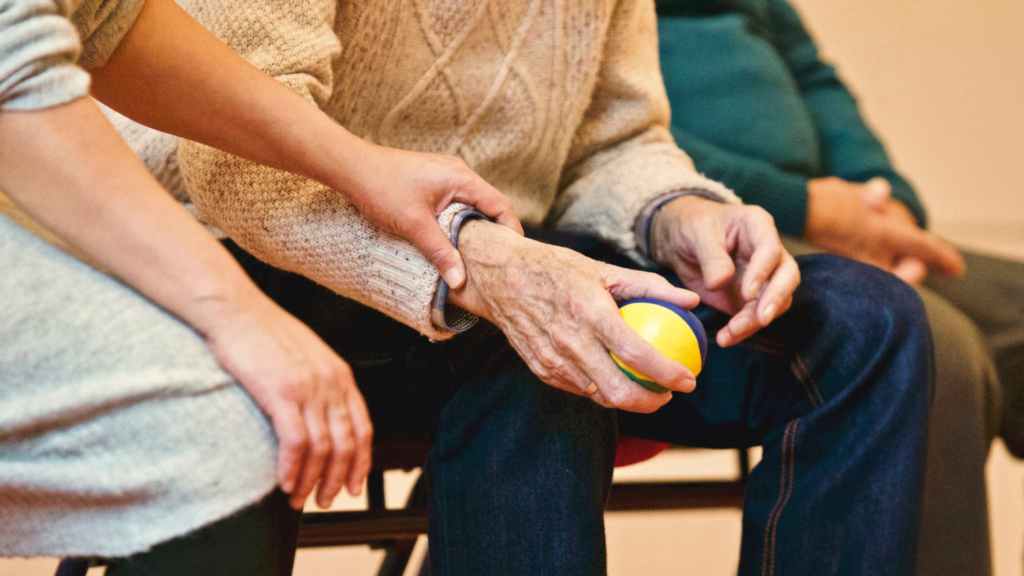
Cycling provides a low-impact way to stay in shape, and is
particularly good for older people, pregnant women, and those recovering
from injury. However, back country routes, hilly terrain, and long
distances can present quite the challenge to the inexperienced rider.
Biking through your neighborhood is not the same as taking a
cross-country trek or negotiating off-road twists and turns. Unprepared
riders often find themselves faced with sore muscles, blisters, and
nausea. And if they don’t carry enough water, they may also struggle
with dehydration and heat exhaustion.
Before you choose a bike, make sure your health is up to par for what you intend to do, and don’t rush into advanced biking too fast. By gradually improving your skills over time, you can work towards loftier bike riding goals without getting in over your head.
What Is Your Budget?
Finally, you’ll want to consider your budget. Bicycle price come in a wide variety of sizes, shapes and styles. And as you might expect, the higher the quality of bike you purchase, the more it will cost. Setting a budget in advance will help you narrow your bicycle search.
If you’re new to MTB, or a road rider looking for the thrills of hitting the dirt and going off-road, it’s handy to know what to look for when it comes to finding the right mountain bike. So check out our top tips on how to find the perfect ride to get trail-ready.
1. Get the right size
First
up, everything else is secondary to the right frame size. But don’t
rely on stated size – while many companies are switching to small,
medium and large instead of increasingly inaccurate numbers, (seat tubes
have been shrinking even as frames get longer), there’s no standardised
idea of what, for instance, constitutes large. One brand’s large can
match another’s medium.
Instead, you’ll want to ensure that your bike is the right fit for you. Look for (and contrast) the reach (distance from the saddle to the bars) and stack (distance from center of crank to mid-head tube) measurements, and don’t be afraid to go longer than with a road bike. A long front triangle puts the axle further ahead, letting you weight it (for grip) without risking going straight over the bars at the first impact. It also helps with climbing by keeping your front wheel planted.
Just don’t go so long there’s no standover clearance. You only need a couple of centimeters. A short seat tube gives good standover and the greatest room for maneuver, but make sure you can still get full pedalling height without overextending the seatpost. Note that 29ers have taller fronts, and that riding position can be significantly tweaked with alternative stems, bars and seatposts.
2. Choose a wheel size
Diameters
have settled to an easy, binary choice of 27.5in (650b, aggressive
trail and downhill) or 29in (XC and trail). However, wide-rimmed Plus
sizes and the recent trend towards 29in downhill wheels are muddying the
waters.
While strong, stiff and light(ish) 29ers will undoubtedly
become more common in the next few years – along with suitable tires
and frames – for now the choice remains largely the same: favor bigger
hoops for big miles, or smaller, stronger ones for smashing trails. Plus
sizes can really pay off on hardtails, but they’re sensitive to tire
pressure and there’s some question over whether they’re really here to
stay.
3. Choose hardtail or full-suss
The
rear shock, bearings, linkage and extra manufacturing complication of
full suspension all cost money. Consequently, you’re likely to get a
better parts spec on a hardtail over a full-suss bike at the same price.
You’ll have less maintenance and fewer things to go wrong, too.
On the other hand, full-suss bikes are now more advanced than ever, so their advantages can still outweigh their disadvantages. There’s no need to dismiss either, but forget needing to ‘learn’ on a hardtail before getting ‘a big bike’ – it’s a myth. Really, this one is preference.
4. Don’t obsess about weight
Weight
is important, but off-road, strength is marginally more important.
Flimsy has no place when random rocks, roots and ruts can grab at you
from all angles – steering accuracy, cornering and confidence all
suffer, dragging your speed down with it. It’s better to carry a few
extra pounds and keep your bike out of the hedge. And out of the
workshop, too.
5. Beware the flashy trinkets
Don’t be fooled by a nice rear mech (derailleur): it’s common for these to be up-specced to help sell the bike. A quality mech is important, but so too are the shifters and cranksets – even the chainrings aren’t too far behind. Be aware that lower spec components are heavier, more rudimentary and not worth paying a premium for, so factor in your plan for future upgrades.
6. Choose suspension quality, not quantity
Check
the reviews of the forks and shocks (on full suss) on the bike you’re
looking at, and use the manufacturer’s site to get the exact models.
Note that OE (original equipment) units can be a different (often lower)
spec than similar-looking aftermarket ones. Quality damping and a
decent air spring will do far more for you than any amount of extra
travel.
7. Look for futureproof design
Check for current/popular axle diameters and spacing, plus headset, bottom bracket and even seatpost diameters – you’ll struggle to get the increasingly popular dropper post (for changing saddle height on-the-fly) in the smallest diameter, for instance. Internal routing for ‘stealth’ droppers is also desirable, though what internal gear cabling/brake hosing gains in looks it can lose in noise and ease of maintenance.
8. Keep some budget back
You
will benefit from a dedicated trail helmet, with its greater coverage,
stronger construction and decent peak. You may also want a backpack,
plus glasses for warding off flying crud. Then there are sticky shoes
for flat pedals, or mountain bike specific shoes, cleats and clipless
pedals.
You may also want new tires to suit your terrain, or simply because OE tires may use harder, cheaper compounds and/or heavier steel beads than their aftermarket namesakes. You may also want to tune your gearing, and almost certainly to customise the shape and size of your cockpit.
On the upside, this all still counts as upgrading your bike!
A bike’s chain is one of its most important parts. If you are using your bicycle regularly, you would know how important it is to lubricate it. However, properly lubricating it is another thing.
You don’t just simply pour oil or lubricant on the chain. Unfortunately, doing that can only help so much. Knowing how to lubricate bicycle chain properly can help you maximize your lubricant and your bike itself.
Why Is It Important To Lubricate Your Bicycle’s Chain?
Again, lubricating your bike’s chain can help keep it in top shape. It keeps your chains from accumulating rust. Here are some more benefits you can get from regularly lubricating your bicycle’s chain.
1. Your chains will take longer to get worn
Keeping your chains from accumulating rust will help lengthen its lifespan. Thus your chains will take longer to get worn. As most of you would know by now, bicycle chains that accumulate rust are more prone to damage as they become brittle. That is what we’re trying to avoid since that may cause accidents while the bike is in use.
2. Chain links maintain their flexibility
With rust, it will be harder for your chain links to move with ease as you ride the bike. This would explain why most bikers would feel as if every pedal is a bit heavier or harder. Or the bike is simply more difficult to maneuver. If you don’t want to tire yourself out as well, it is best to treat your bicycle’s chain with some lube.
3. Other parts such as the derailleur assemblies and drive train cogs are also affected.
It is not just your chains that you’re helping when you treat them with some oil/lube. Other parts benefit as well. Your derailleur assemblies and drivetrain cogs are kept from getting worn easily. There are still a lot of other benefits you can get from regularly lubricating your bicycle chains. This is why we are listing for your below a step by step instruction guide on how to lubricate bicycle chain.
Things You Will Need
First, here are several things you might need:
Oil/lube
Brush – even an old toothbrush or flat blade screwdriver would do.
Dry rag/cloth
Old newspaper – use old newspapers to cover the floor with if you do it inside the house
The Procedure
Step 1: Check which parts of the chain need lubricating the most.
Turn the bicycle upside down first to get an overall view of what you need to work on. Check the chains one by one to see which ones need lubricating the most. Also, check if there are any damaged or broken ones so you can get them repaired before lubricating. You can also start checking other parts as well such as the derailleurs and drivetrain cogs while you’re at it.
Step 2: Scrape off any mud or dirt on the rear derailleur.
Using the tip of a screwdriver or the brush, remove any accumulated mud, dirt or even a bit rust on the chains and most especially the rear derailleur. Remember that putting the lubricant without cleaning off the existing mud/dirt will only lessen it’s effective. If you cannot remove the rust or whatever substance, don’t force it off. This can only inflict further damage to the parts.
Step 3: Wet/Dampen the rag before wiping the chain.
With just the right amount of water, dampen the cloth or rag. Make sure that it is not to wet since you will just be wiping off any remnants of the mud or dirt. Any excess water on the bicycle parts can only cause rust when not properly dried off. Hold the chain between your hands with the rag and start rotating the chain to be able to cover the whole chain. You can repeat the process twice or thrice until you feel that any dirt remnants has been removed already.
Step 4: Lubricate the chain.
Lubricate each chain/link one by one. Make sure that you have covered all the chains. You can also drop a little lubricant on each gap where two links overlap. This is to ensure that you are missing no sides. However, be careful not to use too much lube. It will only go to waste after your wipe the excess off.
Step 5: Wait for the lubricant to set before removing any excess.
After ensuring that the whole chain is lubed, wait for it to settle first. This will give the lubricant enough time to work its way through the chains. However, after letting it settle down, remember to wipe off all excess lube. The excess lubricant on the chains will only attract new dirt to your chain. And that is what we are trying to avoid.
Wrapping It Up
It is okay to be very meticulous about which brush, rag or lubricant itself you will be using to do the whole process. After all, this process is essential in keeping your bike in top shape and speed. It is crucial to not skip out on any steps as well. This will help you cover all parts of your bicycle that need care.
We all hear people talking about their “first clipped in ride” or “first
clipped in fall” and some might think what are the benefits of using clipless
pedals or wonder where to start…..so we aim to help using this article! Below
is the different kinds of pedals and cleats you can find on the market today,
with handy tips on setting them up and how they benefit your cycling!
Standard or Flat
Pedals
These usually come on the bike as standard, more so on mtb bikes or
hybrids. They are as the name suggests standard flat pedals for use with any
footwear. Some are plastic some are metal depending on cost and their intended
use. They come in various sizes and colours. These sorts of pedals are popular
with people who have maybe tried clipless pedals and not liked it or simply don’t
like the idea of being clipped into the pedal. They do have the downside of not
being able to use a full pedal stroke when cycling, so only about a 1/4 of the
pedal stroke produces forward momentum.
Clipless pedals replace the toe clips of the past where a riders shoes
would be “clipped in” at the toe end of the pedal and sometimes had straps for
the rear of the shoe, these were ok but difficult to disengage and were not the
greatest if you had an accident especially if you had straps on too.
Shimano SPD Pedals
& Cleats
Popular with MTB and off road riders these have the benefit of being able to use more of the pedal stroke than a standard flat pedal, as with practice you are able to push, “scrape” (pulling the foot along the bottom of the pedal stroke – kind of like wiping dog muck off your shoe) and pull the pedal back up meaning you are using more of the pedal stroke and producing more forward momentum, this is more so noticeable on hills where the pulling up motion produces more power to get up the climb. These also come in all shapes and sizes the ones pictured above are for dual use so they can be used with normal flat shoes or can be used with MTB cleated specific shoes simply by flipping the pedal arround.
Shimano PD-M520 Pedals
The ones above are for MTB cleated specific shoes only as they have no
other platform for the foot/shoe to push against other than the cleat in the
shoe itself. There are also double sided cleated pedals, double sided
cleat only pedals and come in all sorts of styles to suit the rider.
Finding the one that suits you best can be tricky, but once you have
found the one that is right for you its alot better than riding on standard
flat pedals.
Shimano SPD MTB Cleats
The cleats for SPD pedals are small and metal and fit into the underside
of the shoe with allen keys to secure them in one place. They are designed not
to come out of the cleat mechanism whist in normal pedal motion and disengaging
the cleat from the pedal is usually done by a side to side motion – simply
moving the foot from the ankle in a twist like motion disengages the cleat and
your foot is free from the pedal. People often worry that in an event of an
accident that the foot would remain stuck to the pedal, having had an accident
myself on a clipped in ride and doing lots of research into them before buying
them, the cleats will not remain clipped into the pedal in the event of an
accident, any movement other than the normal forward to back motion of the
pedal stroke leads to the cleat disengaging and the foot becoming free.
The shoes for SPD pedals are usually designed with off roading in mind,
but some do come in more commuter friendly styles enabling the daily commuter
to ride clipped in and still walk around the workplace safely as the cleat is
in the underside of the shoe and the shoe sole is higher than the cleat meaning
it’s just like walking in a normal pair of shoes. They do have the drawback for
some of not being comfortable on long rides due to the style and fitting and
sometimes the narrowness of the cleat and pedal on some styles can create
pressure points in the underside of the foot leading to pain and
discomfort so if looking for a set up for longer days in the saddle these may
not be for you.
Shimano SPD
SL Pedals & Cleats
Usually used by road riders as they are not really suitable for use off
road due to the nature of the protruding cleat. The cleats come in 3
variations of the same style, but vary on the amount of float they offer –
float being side to side movement before the cleat disengages.
Yellow cleats offer the most float at 6 degrees and are the best ones to
have if you are a beginner or have issues with your knees or hips due to the
fact they allow the most movement in the ankle and knees when in use. They are
fastened to the bottom of the shoe with 3 allen key bolts and are adjustable in
forward/back and angle they are on the shoe.
Blue Cleats are the same as yellow but only offer 2 degrees of float.
They are said to offer most a good balance between comfort and efficiency but
should be avoided if you have issues with knees and hips for the reasons
detailed above.
Red cleats have 0 degrees of float and should only be used by
people who have both experience of riding in cleats and have made sure that
they are going to work for them due to the fact they keep the foot in a rigid
position, they do offer the most efficient pedal strokes and loose no power but
for anyone with any muscular or skeletal issues in the lower body will suffer
using these.
The pedals for Spd SL come in all shapes, sizes and materials from steel to carbon wide to thin – all depending on preference of the rider. Personally I have Shimano 105 5800 Carbon SPD-SL due to the fact they have a comfortable platform to use, they are wider than some models and lightweight – but not at a premium cost to the bank balance! Again riders should try different types until they find the one they like beg/borrow of friends to see what theirs feel like to make sure you are getting what you want before splashing the cash on what look good but might not be practical, speaking from experience I had a cheap steel pair which were relatively thin, caused pressure points on my feet meaning I was in pain after about an hour or so and this severely affects your ride, as one of my favorite sayings is “comfort over style” – a phrase I stick by when it comes to by bike as not being comfortable on the bike is a bigger determinant to the performance on it that an extra few grams on the heavier items or less aerodynamic items!
The SPD SL works much the same way as the SPD in the sense of
twisting the foot to the side will disengage the cleat and allow the foot to
release, to engage it simply put the toe into the pedal and push the heel down
as pedaling. Much in the same way as the SPD the difference in performance is
noticeable once used to using them.
SPD SL shoes are not like SPD shoes and are much more difficult to
walk around in off the bike, also not advised to do so unless you have cleat covers due to the damage it causes to the cleat.
They come in different styles, colours and materials to suit the rider,
some have carbon soles that can be molded in the oven for added fit and
comfort. Fit is vital in the shoe because it is your main contact point and
movement point whist on the bike so be sure to do your research before hand, if
possible try a friends pair on see what the fit feels like, visit a
LBS to try a few pairs on then make a decision, things like Hot Foot, Cramp,
Pain in the arch etc etc can all be avoided by a good fitting shoe.
On top of the ones listed above there is also Look clipless pedals and speedplay pedals. Look invented the clipless pedal in the early 80’s and Greg LeMond and Bernard Hinault aka The Badger were the first riders to test them in the pro peloton.
Speedplay Pedals
and Cleats
Speedplay pedal and cleats are different from the traditional
setup of the pedal does not contain all the workings to make it clip in and
out, on speedplays this is all in the cleat attached to the shoe. Used by
pretty much the whole pro peloton now they are some benefits and drawbacks for
you amature rider. Benefits include them being lightweight some are made
from Titanium which is stronger and lighter than steel, and can offer small
gains in performance if used and set up right and they offer the greatest float
adjustment of any cleat being from 15 degrees down to zero, and the double
sided pedal that saves that awkward second or two looking for the right side of
the pedal!
The downsides are they are not for everyone, and they can be hard to
“dial in” the float that is right for you can take some fiddling about. The
cleat also needs to be serviced much more frequently, and is very large on the
bottom of the shoe which means if you are a commuter they are not the best
option given that damage to the cleat would make cycling home very difficult.
Most standard road and mtb shoes will take speedplay cleats, if not adapters are available to purchase and cleat covers to protect them at the cafe stop are also available!
Look Keo & Look
Classic Cleat & Pedal
Look offer a broad range of pedals and cleats on the market ranging from a standard pedal and cleat operation not that dissimilar to Shimano’s, and the Look Keo Blade Pedals offering various resistances to the pedal for engaging and disengaging, they also offer a MTB version for offroading.
Look systems are also said to be a lot easier to engage and disengage
than Shimano systems, and offer a lot more flexibility to “dial in” the comfort
zone for the rider, and are reported to offer the widest platform pedals
increasing comfort and performance. They work in the same way as other clipless
systems in that a turn of the foot from the ankle releases the mechanism and
the foot from the pedal.
The cleats themselves operate the same way but are smaller than Shimano’s and closer to the shoe which can make walking easier but also have cleat covers to protect the cleat when walking. Look cleats and pedals will work will all road and MTB shoes as they attach to the shoe in the same way as other brands.
So there we have it the main pedal and cleat systems available on the
market today. There are of course many variations within this but we wanted to
keep it simple! We advise getting professional advice on fitting cleats as if
they are not fitted correctly or in the right position needed for you they can
cause issues or even damage to the lower body especially in the knees. If a
bike fit is not an option for you there are plenty of articles on it online but
also videos on youtube our favorite is bellow as it offers the best advice and
has the added bonus of being from GCN our second favorite cycling advice
guys – besides Bike Bible of course!
We hope we have not missed anything out – but if we have let us know in
the contact us section on the website and we will be sure to put it right!
This is kind of a two part question and answer because it should be taken in the context of both water for exercise and water for weight loss. Water can help with both and if you’re not drinking enough it’s easy to get discouraged or not perform at your best.
I have to admit that I’ve never been good at drinking enough water. I would drink it while exercising but the bulk of my daily fluid intake was as either soft drinks (regular for years followed by years of the so-called ‘diet’ drinks) and coffee. I don’t think it would be inaccurate to say that I was chronically dehydrated from the age of 18 to 40.
As a side note, I haven’t had a drink of soda since January 1st!
Why didn’t I drink enough water? Mainly due to the taste. I didn’t like the taste of plain water except when I was exercising. And I wasn’t exercising very much. It wasn’t until last year, and again this month, that I really took a hard look at my water consumption and did something about it.
Why is Water Consumption Good?
A quick search of Google yields millions of results on why you should be drinking enough water each day. I’m not going to bore you by linking all of them here. Besides, that would take like forever. I will give you a few reasons why drinking water is good for you from an exercise and weight loss perspective. They are:
Water accounts for up to 60% of our body weight and every system depends on water to function properly. Water carries nutrients throughout our body, flushes toxins out of our system and keeps us hydrated.1 It regulates our core temperature. This is especially critical when exercising in extreme temperatures. It may help keep us from overeating. One of the things people are told is that drinking a glass of water before eating may help them eat less when sitting down to feast.2 It keeps us hydrated. Staying hydrated is important for our body to perform properly as well as being able to exercise at our top potential. One theory regarding weight loss is that being dehydrated can be mistaken for hunger2. Instead of immediately eating when you feel hungry try downing some water first to see if it takes care of the craving.
Bicycle water bottle
How Much Water is Enough?
Our daily water intake varies by several factors including age, sex, exercise level and where we live. The USDA has published guidelines based on age and sex.3 For my age group, they are:
Males, 31-50 years old, 3.7 liters/day
Females, 31-50 years old, 2.7 liters/day
These intakes are to include water consumption from all sources (i.e. food, beverages and normal tap water).
How Much Water am I Drinking?
Like I said earlier, I was probably dehydrated from the ages of 18-40 because I didn’t drink enough water and instead lived on coffee and soft drinks. That ended last year when I started drinking more water. I did real good up until late last year and lost sight of the need to stay hydrated.
This past week I got serious about my water intake and started drinking between 64 and 80 ounces a day not including any water intake from food, beverages or what I drink while riding.
I Needed Help
One of the big things I changed this month was really tracking how much I was drinking everyday. I knew I needed to drink more water each day but I had a bad habit of getting busy and forgetting about it. Before I knew it the day would be over and the water bottle on my desk was still sitting there empty from the previous day or full from refilling it at some point. I needed help so I turned to my smartphone.
I downloaded a simple (and free) app that let me set how many glasses of water I wanted to drink each day and it reminds me how much I have left to drink that day. As I drink a glass I open the app and tap a water glass to add to my daily consumption. Each hour I get an alert on my phone reminding me how much water I still need to drink that day. The amount of water you want to drink each day, when you want to get alerts, and how often you want to be reminded were all options in the app.
The result? I drank between 64 and 80 ounces each day (including the weekend) last week. I found the app critical in reminding me to drink water.
The Challenge
Are you up for this? I hope so. If you’re having problems drinking enough water each day I want you to make a commitment to do it for the next four days. Starting tomorrow I want you to start measuring how much your drinking and log it. If you can find an app, get it, and use it. I use Windows Phone 7 and if I could find an app for this there’s got to be a ton out there for the iphone and android.
Each day I want you to go to the Biking to Live Facebook page to let me know how you did for the day, what your challenges were and any benefits you saw (i.e. felt better, was less tired, exercised better, lost some weight, etc.). I’ll make a short post announcing the Daily Hydration Challenge and all you need to do is ‘Like’ it to accept the challenge and then keep us all posted on your progress.
1) I love climbing (meaning “I climb well compared to others”)
2) I hate climbing (meaning “Climbing is not my strongest asset”)
There are many factors effecting climbing. They include how you train, what your natural abilities are, the tactics and strategies you use while climbing, and to some extent the equipment you use. This month I’m going to discuss the tactics and strategies that lead to more successful climbing. Next month I’ll outline some specific workouts you can use to improve your climbing fitness. I want to start with how you climb because it’s an area that, when applied, can result in immediate improvements and is often overlooked by even the athlete most dedicated to improving their climbing through training.
Regardless of your current fitness and natural abilities you can climb better by climbing smarter. Sprinters I coach have also won the Washington and Arizona State Road Race Championships by applying some of these strategies. Yes, I did have them train in a way that helped them improve their climbing and will discuss that in Part II next month, but that is just part of the equation.
Here is some of what you’ll find in my book Base Building for Cyclists and some of the advice I give my athletes.
Be near, but not on the front
Be sure you’re near the front when the race reaches the climb: know the course! Don’t get caught having to work too hard to get to the front just before the hill. You want to be somewhere around the 10-15th rider (or at least in the front third of the group) early on and top 10 when you reach the base of the hill. Get to that place in the bunch early and focus on staying there. If you’re too far back you may get gapped when the climbing starts, but you don’t want to be “on” the front (in the wind) and working hard on the way up to the base of the climb either since that will use up energy you’ll need for the climb.
If you’re a strong climber you’ll want to be up near the front to go with the attacks on climbs. If you’re not a strong climber you want to be up near the front to try and slow the pace down and not risk getting gapped from the front group. Message here is that you want to be near the front at the start of the climbs!
I’ve had my sprinters move to the front at the base of a climb and just gradually slow the pace down and settle into their comfortable pace. Many times everyone else will just follow that pace; at least for a while. This lets you get up at least some of the hill with the front group at a pace you can handle. It also makes it necessary for the climbers to find their way around you before they can launch an attack. It also gives you the most room for fading back. If the bunch is 50 riders strong at the base of the hill and you’re in the top 10 you have some room to move back and still stay in contact even if the field splits. If you’re at the back and have 50 riders in front of you then as soon as the climb starts you will lose ground that is very difficult to make up. Put another way, it’s easier to drop back 20 riders on a climb and still be in the pack than it is to catch and pass 20 riders.
One of the keys to successful racing is using the least amount of energy for most of the race and then having that energy available, and using it, at critical points during the race; like climbs and breaks. Power meters give us insight into when, where, and how much energy a cyclist uses in a race. Looking at the files after can help cyclists see how efficiently they ride.
Uphill bike racing
Pacing
The pace will often start out very fast when the climb begins. There will be climbers wanting to break up the field and other riders that don’t know how to pace themselves and they’ll go too hard at the base of a climb only to blow up. Knowing your competition is important so you can make good decisions regarding who to try and stay with. The pace will often settle down a bit after that initial surge. The other place the pace picks up is usually near the top when someone will attack and try and gain an advantage over the top. Listen to the breathing of the riders around you. If someone sounds like the effort is easier to them than everyone else watch that rider and stay near their wheel since they’re likely to have something left in the tank for an attack.
If you do find yourself in a battle on a climb you might have an advantage being behind the rider, or riders, you’re climbing with. Even at speeds as low as 14 mph you can gain a benefit from drafting. If there is a headwind then an advantage can be gained at even slower speeds. You may find that being on a wheel rather than in front of the group also gives you a mental advantage. Being able to see your competition in front of you is often more comforting than wondering what’s going on behind you. If you are a very strong climber and find that you’re the one usually setting the pace then being at the front may work to your advantage as you ‘turn the screws’ in and tear the legs off the riders clinging to your wheel.
If the pace picks up and you’re having difficulty just hold on as long as possible. We often can hang on longer than we think is physically possible. That gap forming between you and the wheels in front of you may be as much a mental as a physical one. There is a point when an “effort” becomes as much, or more, mental than physical. I’ve also seen riders give up and drop off just seconds before the leading group eases up.
If your climb is a time trail race, or during a triathlon, you have the opportunity to choose the pace you climb. Ease into the climb. Heart rate and perceived exertion will lag behind actual effort. A power meter can help you stay within your appropriate range from the start of the climb. Self pacing can be as challenging as trying to hold on to stronger climbers. The motivation of hanging on to a wheel can help keep you going when you might normally back off on your own.
Constructive focus
Don’t focus on the discomfort. Find something positive to focus on like looking up the road and driving the bike forward. Put all your energy and movements into driving the bike forward. Don’t waste any energy; mental or physical. One idea I tell cyclists is to sense that they have a harness around their upper body with a cable attached to the front of it and that there is a giant winch pulling that cable, and you, up the hill. It creates the sensation of being pulled up the hill and acts like a slight mental assist.
Focus on pushing the pedals up over the top and down while very gently pulling on the bars. Think about how with each push of the pedals you’re driving the bike forward and up. Climbing is also a good time to lift your knees while pedaling. This helps un-weight the pedals so that the leg pushing down doesn’t have to lift the weight of the other leg that is resting on the pedal. Don’t try and create power by lifting the pedal, just un-weight it.
The better you know the climb the easier it seems. It’s funny, but the more times I go up a hill the easier, and shorter it seems; given all other things being equal. When you know where the hill kicks up and when it crests you have a better understanding of what to expect and when to exert. Knowing what is around that next bend in the road is an advantage you want.
Climbing up a three mile incline
Keep your head up
Be careful not to focus on just the wheel in front of you. Look up ahead! I’ve found myself doing everything I can to hang on the wheel in front of me only to find that he lost the wheels in front of him and that we were both off the back. If the rider in front of you is loosing the wheel in front of them you have to make your way around them and get back up to the lead group. If you do find a gap forming don’t try and close it with a huge effort. Close the gap gradually with a steady effort. Large increases in speed use up a lot of energy.
If you do find yourself separated from the front group then try and get to the top as quickly as possible. Any gap formed on the climb becomes even greater since the front group will pull away even more when they start descending ahead of you. Try and join or form a chase group. Several riders working together have a much better chance of gaining ground than trying to do it all on your own. If you can’t find anyone to work with then your road race just became a personal time trial to the finish. Pace yourself to get there as quickly as possible without blowing up.
Position on bike while climbing
During long climbs try moving slightly forward and back on the saddle from time to time. This helps distribute the effort throughout more muscle groups. More forward will activate the quadriceps muscles more and moving back will place more demand on the hamstrings and gluteus. Standing periodically may also help. Standing gives you a chance to stretch out and lets you use your body weight to assist in driving the pedals. I’ve found that lighter cyclists, or those that are strength limited, benefit the most from standing. Bigger riders are usually better off staying seated as much as possible.
If you’re already feeling maxed out then standing may be too much for your legs to handle. When you stand you have to support your body weight too and this can drive heart rate up. The key is to not increase the effort when you stand and maintain the same rhythm and power level. You might find that if you’re already redlined that you’ll want to stay seated on steep switchbacks rather than standing. Standing can get you around the corner faster, but it often jacks your heart rate up enough that you have to slow way down to recover. Try standing when the road levels off slightly instead. This will help you keep the pace up too.
Climb smarter not harder
Climbing may or may not be your strength, but by climbing smarter you can gain an advantage over those that waste energy by working too hard leading up to the climbs, attack the climb at an unrealistic pace, start the climb at the back of the group rather than near the front, and give in because they lose their mental focus. Practice these tactics during your training so that they become part of your racing skills.
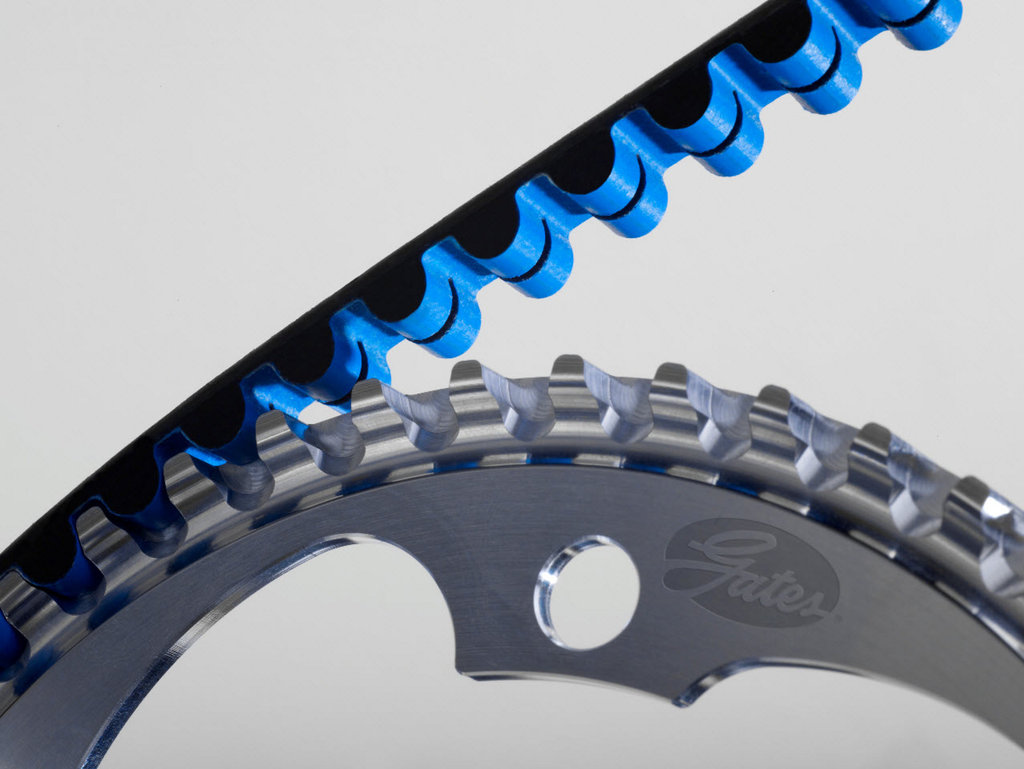
Out of the quite a few electronic vehicles on the planet, the e-bike is the number one promoting product. Bicycles have been the most effective mode of transport for a large quantity of people, but people who are interested for extra velocity, always go for motorbikes. Offering very reliable and affordable electric bikes, these bicycles are a superb investment for anybody who likes nature and doing a little bit of bodily activity, in addition to being trendy. The actual travel can be of a very good quality having a totally upkeep- as well as oil-free co2 toothed buckle fairly than a traditional bicycle archipelago. It eliminates lots of the drawbacks of riding a traditional bicycle for fundamental transportation whereas having few of its personal. This enables the rider to take in the sights extra while smoothing out stresses. It can assist you out on steeper slopes, it won’t let you down. That method in the event that they need to make use of the very best pedal-help setting they are going to nonetheless get 100km of vary out of their 800Wh value of batteries.
Tour de Mongolia 2012
The wait appears to have been price it. For newbies, it may very well be
useful, however it’s worth remembering that the whole point of e-bikes is that
the motor helps you alongside anyway, so I do actually question the usefulness
of this. Electronic bikes or E-bikes as they are popularly recognized are
gaining popularity amongst the bicycle riders. As these bikes don’t burn petrol,
it causes less pollution or you possibly can say no pollution, which in flip can
scale back the results of global warming. Unlike gas-guzzling autos, electric
bicycles do not burn fossil fuels and release no dangerous carbon emissions. It
is an environmentally friendly different to standard motorbikes, as it has lower
carbon footprint, thus, contributing less to air pollution and fossil gas
depletion. With the pollution rising at an alarming rate, we all ought to shift
to e-bikes with a purpose to commute to and fro. As a responsible citizen of
your nation, don’t you suppose that you should shift to e-bike and change into
an Electric Bike Commuter?
He assures me that it can be no downside at all to transform my previous bike
and, after searching for on-line info on the subject, I believe he might be
proper. Therefore, these are the highest benefits of an electric bike. The
easily transportable battery may be recharged probably at a normal plug or while
driving, with all of the second item supplying benefits relating to charge and
the environment. Its velocity is up to 15mph and it can go for 20 to 25 miles
with a single cost. Should you cost the battery for a single time, then it can
last for around forty miles. So an electric bike has to have all features a
fantastic widespread bike has and a battery with astounding battery life and
electric motor that is highly effective sufficient to make an enormous
difference. The most common is a front fork suspension, also called “shocks,”
however you may sometimes discover rear suspension or seat publish suspension,
too. A smartphone interface for controlling Bosch powered electric bikes, it
suits instantly into the Intuvia mount and non-obligatory headlight and rear
gentle with turn signals. An electric scooter is a handy mode of transportation
that you need to use for brief commutes in type and comfort.
The beauty of those machines is that the rider can get as much or as little
exercise as they choose. Your body will get its day by day dose of train once
you trip your e-bike to workplace and to finish other errands. Alternatively
thinking, you can nonetheless get your morning exercise by pedaling but opt for
the electric cruise house within the evening. And as there is less tension of
petrol or oil leakage,they are often stored simply in your home easily. The
particular braking energy can be recuperated, we.e. They are in no explicit
ranking order. Thus, these ebikes are value efficient by which it can save you a
big sum of money. Electric Bikes signify an alternative mode of transport that’s
each eco friendly, convenient and value a fraction of the value a totally
motorized bike would at the moment. While the battery does add a fair quantity
of weight to your entire unit, foldable ebikes are nonetheless perfectly
potential to carry with you between the end of your journey and wherever you
will be storing it for the day.
This bicycle has the capability of overlaying a distance of forty kilometer
on a single 36V lead acid, sealed and rechargeable battery. You’ll be able to
ride an ebike without pedaling significantly for long distance destination. The
type of the battery is what that may let you already know on the distance you’ll
be able to ride. Consumer electronics giant Sony pioneered the primary
commercially obtainable rechargeable lithium ion (or Li-ion) battery. If you
wish to trip often, then a small battery is sufficient. Any take a look at trip
knowledge? For folks that probably would not or else journey a motorbike, in
addition to that don’t want to succeed in work just about all highly regarded
and also exhausted, electric-help mountain bikes really are a cool notion. Most
online as well as brick-and-mortar shops have experienced and expert workers to
help the customer when shopping for an electric wheelchair scooter. Electric
bikes make it routine so that you can shed pounds